http://www.education.vic.gov.au/languagesonline/games/cartoon/csm_help/default.htm
Frame Controls
Image library - people and backgrounds
Picture and text tools
Accent Key Panel
Using Chinese or Japanese characters or non-Roman scripts.
Text bubbles
Audio bubbles
Importing images
Making the background of an image 'transparent'
Saving a Cartoon Story
Printing a Cartoon Story
Viewing or copying a Cartoon Story
Opening and changing a Cartoon Story


 This button opens the Accent Key Panel (see below). To insert an accented letter into the text bubble place the cursor in the bubble and then click on the accented character you want. You can move the Accent Key Panel by by clicking and dragging on the blue bar along the top.


Cartoon Story Maker Help
Cartoon Story Maker lies within Photo & Graphics Tools, more precisely Viewers & Editors. This download was scanned by our antivirus and was rated as safe. The default filenames for the program's installer are CSMaker.exe or _F5F44A001F4805DC4105DC.exe etc. This free PC program is compatible with Windows XP/Vista/7/8/10 environment, 32-bit version. The latest installer that can be downloaded is 6.6 MB in size.
Cartoon Story Maker allows you to make 2D screen based cartoon stories to illustrate conversations and dialogues. Stories can include an unlimited number of frames and are view frame by frame.
You may want to check out more software, such as Web Cartoon Maker, Photo to Cartoon or Web Cartoon Maker Desktop Edition, which might be related to Cartoon Story Maker.
File OptionsFrame Controls
Image library - people and backgrounds
Picture and text tools
Accent Key Panel
Using Chinese or Japanese characters or non-Roman scripts.
Text bubbles
Audio bubbles
Importing images
Making the background of an image 'transparent'
Saving a Cartoon Story
Printing a Cartoon Story
Viewing or copying a Cartoon Story
Opening and changing a Cartoon Story
Interface overview
File options
- New - Closes the story you are currently working on and starts a new blank story.
- Open - Closes the story you are currently working on and opens a story that has previously been saved. You can then add to or edit the story.
- Save - Saves the current story. If saving for the first time you will be prompted to name the story and select a location where the story is to be saved.
- Save as - Saves the current story as a new file.
- Preview - Opens the current story in the 'player' so you can see what the finished story will look like. Note: Stories must be saved before they can be previewed, a prompt will appear if there are unsaved changes to the current story.
- Print - Prints the current story with two frames to each page (this can't be changed). The standard printer dialogue box opens allowing you to select print options.
- Help - Opens the Help file
- Quit - Closes the Cartoon Story Maker
Frame controls
Cartoon Stories begin with one frame. Frames can be added, deleted, copied and pasted using the frame control buttons. Also use the control buttons to move to the next or previous frame. There is no limit to the number of frames a Cartoon Story can have.
Image library - people and backgrounds
The Cartoon Story Maker comes with a number of image libraries. Use the arrows below each item to view the various images. Drag and drop the item you want onto the frame. Use the 'Picture tools' (described below) to change the size and rotation of images.
|  |  |
The difference between 'foreground' and 'background' images
'Foreground' images (any of the images from the people libraries) behave differently than images from the background library.
- You can add an unlimited number of foreground image to a frame.
- You can only have one background image on each frame. If you drag a new background image to a frame the previous background will be deleted.
- The order of foreground images can be changed. By selecting an image and then clicking on the 'Bring forward' or 'Send behind' controls you can move an image infront of or behind other images on the screen.
- Background images always stay at the back.
- You can change the scale and rotation of both foreground and background images
Picture and text tools
Picture tools - enable you to manipulate library images, imported images, backgrounds and text bubbles placed in the frame. You must select an object to manipulate it. Do this by clicking on the image, or if it is a text bubble by clicking on the 'handle' (a blue line will appear around the selected item). Then click on one of the picture tool buttons.
Text tools - enable you to format the text in bubbles and information boxes. You must select the text bubble first. Do this by clicking on the 'handle' - (a blue line will appear around the selected item). The format of the selected text can now be changed by clicking on one of the text tools.
- Text formatting can only be applied to the whole bubble, not to individual words.
- Audio bubbles cannot be manipulated with object controls.
- Text bubbles cannot be rotated or flipped.
Accent Key Panel
This button opens the Accent Key Panel (see below). To insert an accented letter into the text bubble place the cursor in the bubble and then click on the accented character you want. You can move the Accent Key Panel by by clicking and dragging on the blue bar along the top.
Changing the letters on the Accent Key Panel
You may wish to customise the accented letters which appear in this panel. The letters on the Accent Key Panel are drawn from a file called 'accent_key.txt'. By changing the letters in this file, you change the letters that appear on the Accent Key Panel. Any Unicode characters can be added to this panel.
This text file is stored in the Cartoon Story Maker program folder. With a typical installation this will be found in 'C:\Program Files\Cartoon Story Maker' (or do a search for 'accent_key.txt').
The Accent Key Panel can hold 57 letters, any additional letters will not appear. To change the letters:
- Open 'accent_key.txt'
- Delete any unwanted letters and add your own. (You can use the 'Character Map' (found in Programs > Accessories > System tools) to find the characters you want. Make sure the font is set to 'Arial'.)
- There should be no spaces or carriage returns between the letters.
- Save the file.
The new letters will only appear after the Cartoon Story Maker has been restarted.
Using Chinese or Japanese characters or non-Roman scripts
A general rule is: use the same input method to type the script into the Cartoon Story Maker as you would in MS Word. This is done by changing the IME (or input method). This is done through the Regional Setting Control panel. Once a new 'input method' has been added to your system you can select with the 'language bar'.
NOTE: Some languages (for example Pin Yin and some Cyrillic languages) now use a font rather than an input method to type letters not found in the Roman alphabet. In this case a different font is selected to enter those letters. This will not work in the Cartoons Story maker as the font cannot be changed. Other languages, such as Vietnamese, use Third Party systems to enter certain characters. These systems will not work with the Cartoon Story Maker either.
Ask your IT support for help if you are unsure about setting up the correct input method for your LOTE.
Text bubbles
Text bubble libraries
Use the navigation arrows below each text bubble to view bubble styles and sizes. Once a bubble has been dragged and dropped to the frame you can:
- Add your own text by deleting the display text and typing new text
- Change the style of bubble by clicking the navigation arrows below each bubble.
- Move the bubble by clicking and dragging the 'handle'
- Change the size of the bubble by selecting it (by clicking on the drag spot) and then clicking on the 'enlarge' or 'reduce' buttons from the 'picture tools'
- Change the formatting of the text by by selecting the bubble and using the 'text tools' to:
- increase or reduce the size of the text inside the bubbles
- change the text colour
- make the text in the bubble bold, italised or underlined
A Text bubble after it has been dragged onto a frame
NOTE: Text formatting can only be applied to the whole bubble, not to individual words. The font cannot be changed.
Audio bubbles
You can add voice recordings to a frame. The recordings can be made on the spot using the built-in recorder or you can import pre-recorded (MP3) sound files.
- The sound recording can be any length, but it is better to limit it to a sentence or two.
- You can add as many sound bubbles to a frame as needed
Drag an audio bubble to the frame to insert a recording.
How to add an existing MP3 sound to a frame:
| 1. Drag an audio bubble onto the screen and click on 'Add Sound'. NOTE: All other tools will now be disabled. |  |
| 2. Click on the 'Existing sound' button. |  |
| 3. Use the browse window to navigate to an MP3 sound file. Add the sound by double clicking on it or by selecting it and clicking the 'Save Sound' button. NOTE: Only MP3 sounds can be added. To use sounds saved in other formats use an audio editing program or an online sound converter to change the sound to an MP3 file. |  |
| Click on the 'Play' button to hear the sound. To change the sound click on the 'Edit Sound' button and repeat the process. |  |
How to add a new voice recording to a frame:
Before you can add a voice recording you must plug a microphone into the computer, and make sure the record and play back settings on the computer are set to the appropriate levels. Use the computer's Control Panel to do this.
| 1. Drag an audio bubble onto the screen and click on 'Add Sound'. NOTE: All other tools will now be disabled. | |
| 2. Click on the 'New Recording' button. This opens a simple record panel. | |
Recording your voice:
|  |
| Click on the 'Play' button to hear the sound. To chnage the sound click on the 'Edit Sound' button and repeat the process. | |
Hint: Recording begins the instant the Record button is clicked, so make sure you have your sentence prepared, and begin speaking straight away For clear recordings hold the microphone just below your mouth and speak in clear a loud voice.
Importing images
You can import your own images into the Cartoon Story Maker. For example you can import digital photos, images from the internet or pictures you have created with another program into the Cartoon Story Maker and include them in your story.
To use an image from the internet you must first save it on computer. When you have found the image you want RIGHT click on the image and select 'Save picture as'.
Once placed on the frame imported images can be manipulated with the picture tools.
The same general rules apply to imported foreground and imported backgrounds as apply to images from the libraries (see above). The only difference betweeen imported foregrounds and imported backgrounds is that imported backgound images are resized to fit the frame area.
Only JPEGs, GIFs or PNG images can be imported. Other types of images can easily be converted to one of these formats using a simple image editing program such as Paint or one of the many online image converters (search for 'online image converter ').
| 1. Click on the 'Browse' button below the import image or import background viewers. This will open a browse window. |  |
| 2. Use the browse window to navigate to the image you want, select and click 'Save' (or double click on the image) . |  |
| 3. The image now appears in the library holder. It can now be dragged and dropped onto the frame. |  |
Making the background of an image 'transparent'
The frame below shows a background image found on the web and imported into the Cartoon Story Maker. A digital photo of a student has been placed in the foreground, as though the student were really there. To achieve this effect, the background of the student's photo has been made 'transparent'.

1: Take the photo against a plain coloured, evenly lit background with significant contrast to the subject.
| 
2: Use the 'Magic wand tool' in an image editing program to select and delete the background.
| 
3. With the photo of the student having a 'transparent' background it appears that she is standing in front of the Eiffel Tower.
|
Most image editing programs have a 'Magic wand' feature (for example Photoshop, or 'Paint.net' which can be downloaded free from the internet).
NOTE: Images with transparent backgrounds can only be saved as PNGs or GIFs
Saving a Cartoon Story
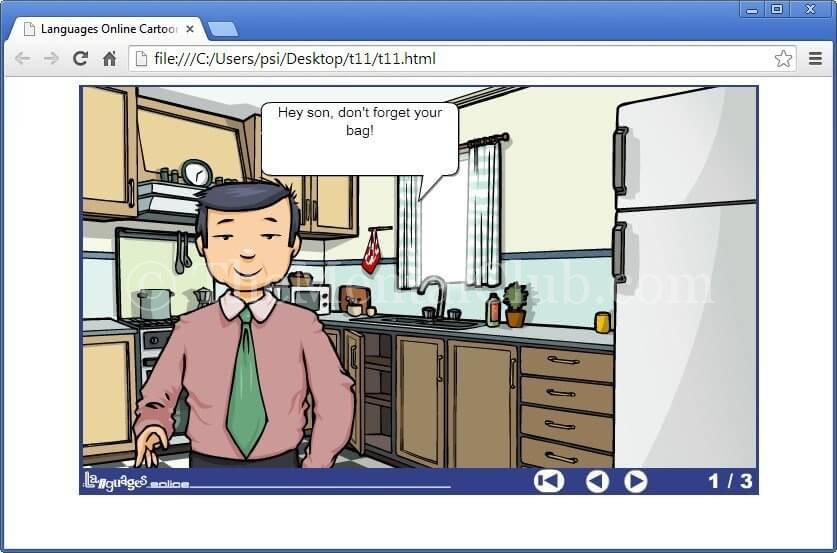
When complete, your Cartoon Story is saved as an html page. You do not need the Cartoon Story Maker to open and view a finished Cartoon Story. It can be viewed using a web browser such as Internet Explorer.
- Unfinished stories can be saved and then opened again and completed
- To save a story you must have at least one item on the first frame
- IMPORTANT File names must be in the system font. For example, if your system uses English then don't use other alphabets, Chinese or Japanese characters or even accented letters in the file name.
| 1. Click on 'Save'. If saving for the first time the Save box will open. | |
2. Enter a name for your Cartoon Story, navigate to the location on your computer where you want to save the file.
Hint: If working with students it's a good idea for them to include their name or initials in the file name. This makes it easier to keep track of which story belongs to who.
3. Click on 'SAVE'. The Save box will close. Click on 'Preview' to view the saved story. You can continue to work on your story or if complete Quit the Cartoon Story Maker.
|  |
Printing a Cartoon Story
| You can print a story that is currently open in the maker. The PRINT button will open your computer's standard printer dialogue box. This allows you to select which printer and set other printer options. Stories are printed two frames to a page. This cannot be changed. If you have a PDF printer installed you can print the story to a PDF file. |   |
Viewing or copying a Cartoon Story
Once your Cartoon Story is completed you do not need the Maker to open and view your story. Cartoon Storys are saved in a new folder with the name entered when saving, and in the location specified. Inside the folder is a html page also with your stories name. To view the story open this html file. There is also a 'data' folder which contains all the images, sounds and text your story needs to play. If you alter or delete any files in this folder your story may no longer play.
1. To view a Cartoon story open the Cartoon Story folder. Double click on the webpage icon and your Cartoon Story will open.
|  |
| 2. To copy or move a Cartoon Story, you must select the whole folder, not just the html file. Copy and paste the folder like you would any other file or folder. You can also drag and drop the Cartoon Story folder to a new location. |  |
Opening and changing a Cartoon Story
Cartoon Stories can be loaded back into the Cartoon Story Maker. This means you can save a partially completed Cartoon Story and then open it at a later time to complete. You can also correct mistakes or make any other changes.
| 1. Click on 'Open' from the file controls. | |
2. Navigate to and select the Cartoon Story folder you want.
Make sure you select the folder, and not the data folder inside.
The Cartoon Story will then load back into the Maker
Once you have made your additions or changes click click on'Save'(to save the changes) OR ''Save as' to save the changes as a new file.
|  |
How to create cartoon with Cartoon Story Maker?
Want to create cartoon? Want to know how to create cartoon? Create a 2D cartoon with Cartoon Story Maker. This software is available for Windows PC. Windows users can use this program easily.
toon stories with discussions, dialogs, and distinctive foundations.
You can save your created 2D cartoon in HTML formats. You can open the output files in a web browser. Actually Cartoon Story Maker is a very useful tool for beginners to create 2D cartoons. No special PC hardware requires for using this software.
Supported Platforms:
Cartoon story maker is supported on all versions of Windows. (Windows XP, Vista, 7, 8, 8.1, 10).
Features:
- Supports all windows platforms.
- Easy to create a 2D cartoon.
- Amazing audio recording feature.
- You can add your voice.
- Built-in audio recording facilities.
- Best import and export feature.
- Save in HTML format.
- Output in web browser.
How to create cartoon with Cartoon Story Maker?
Download “Cartoon Story Maker” from this link and install it on your PC and use it.
It is really helpful mam
ReplyDeleteI really want to use this program, but it does not work the html produced on any broswer. Only frames are displayed. I have tried it in windows 7 and 10. Can you think what can be blamed?
ReplyDeleteI’ve read some good stuff here. Definitely worth bookmarking for revisiting. I surprise how much effort you put to create such a great informative website. watch cartoon online
ReplyDeleteIt is my first visit to your blog, and I am very impressed with the articles that you serve. Give adequate knowledge for me. Thank you for sharing useful material. I will be back for the more great post. kisscartoon
ReplyDeletekisscartoon Awesome and interesting article. Great things you've always shared with us. Thanks. Just continue composing this kind of post.
ReplyDeleteMerely a smiling visitant here to share the love (:, btw outstanding style. toonlocker.com
ReplyDeleteเกมส์ใหม่ I think this is an informative post and it is very useful and knowledgeable. therefore, I would like to thank you for the efforts you have made in writing this article.
ReplyDelete